


Securesay, developed by students for students and faculty, enables secure communication within an academic environment for group projects. With this platform, Students are able to send notes, files, images, and other pertinent documents securely to their group peers.
Securesay is an application geared toward post-secondary education communities that let scholars send encrypted messages to their peers, professors, tutors, etc.
Messaging and email encryption can be important especially when sending confidential information. In academic settings, this can be project designs only meant for group members, sending important project documents and ideas to professors for their approval, etc.
I was in charge of the UX/UI design and initial research tasks for the SecureSay project. This included user research, early wireframes, visual design, branding, screen flows, and design systems.
Conducted:
— Initial Research (User Interviews)
— Information Architecture
— Wireframing
— UI Design
Kyle Hodge — Engineer
Anthony Hsia — Engineer
Maaz Javed — Engineer
Xunjie Zhou — Engineer
Me — UI/UX Designer & Researcher
Secure Say was completed using an end-to-end process as a native and web application.
5 months to release the first version of the app.
SecureSay’s target audience includes students and faculty at post-secondary institutions. Since many emails and important documents can sometimes be sent insecurely, we wanted to ensure that information would have a high level of confidentiality when sending.
The team also wanted to focus heavily on group projects in academic settings where project proposals, ideas, designs, and approvals would be sent to the professor and group members.
During the beginning phase of the project, user interviews were conducted. The main questions asked during interviews focused on features a student would find helpful in the application.
Many students cited a number of features that would assist them while participating in a group project. We wanted to narrow this feedback down to the most useful features to include within the application.
To better understand the wants and needs of students participating in group projects, I created a student profile survey to gain feedback from students on campus. Some answers are from students who have already participated in group projects in the past.
Questions revolved around two main points:
What are your main concerns when sending messages to your peers in an academic community?
How can an IM system help you accomplish project goals?
What features within the application would assist students when completing projects?
User research was quintessential. I gathered as much information as I could in order to understand the challenges they face and how they see the app making a difference in relieving pain points. I wanted to also understand what features the user would like to see that would help to target project needs. Below are a few response from the user questions.
Remaining responses to questions included:
— The ability to send different file formats pertaining to project needs.
— Ensuring that messages are sent securely without getting lost. This was one of the main concerns for students as this problem has happened in the past for a few of them while working in team projects.
— File and document sharing so all project members can view pertinent information.
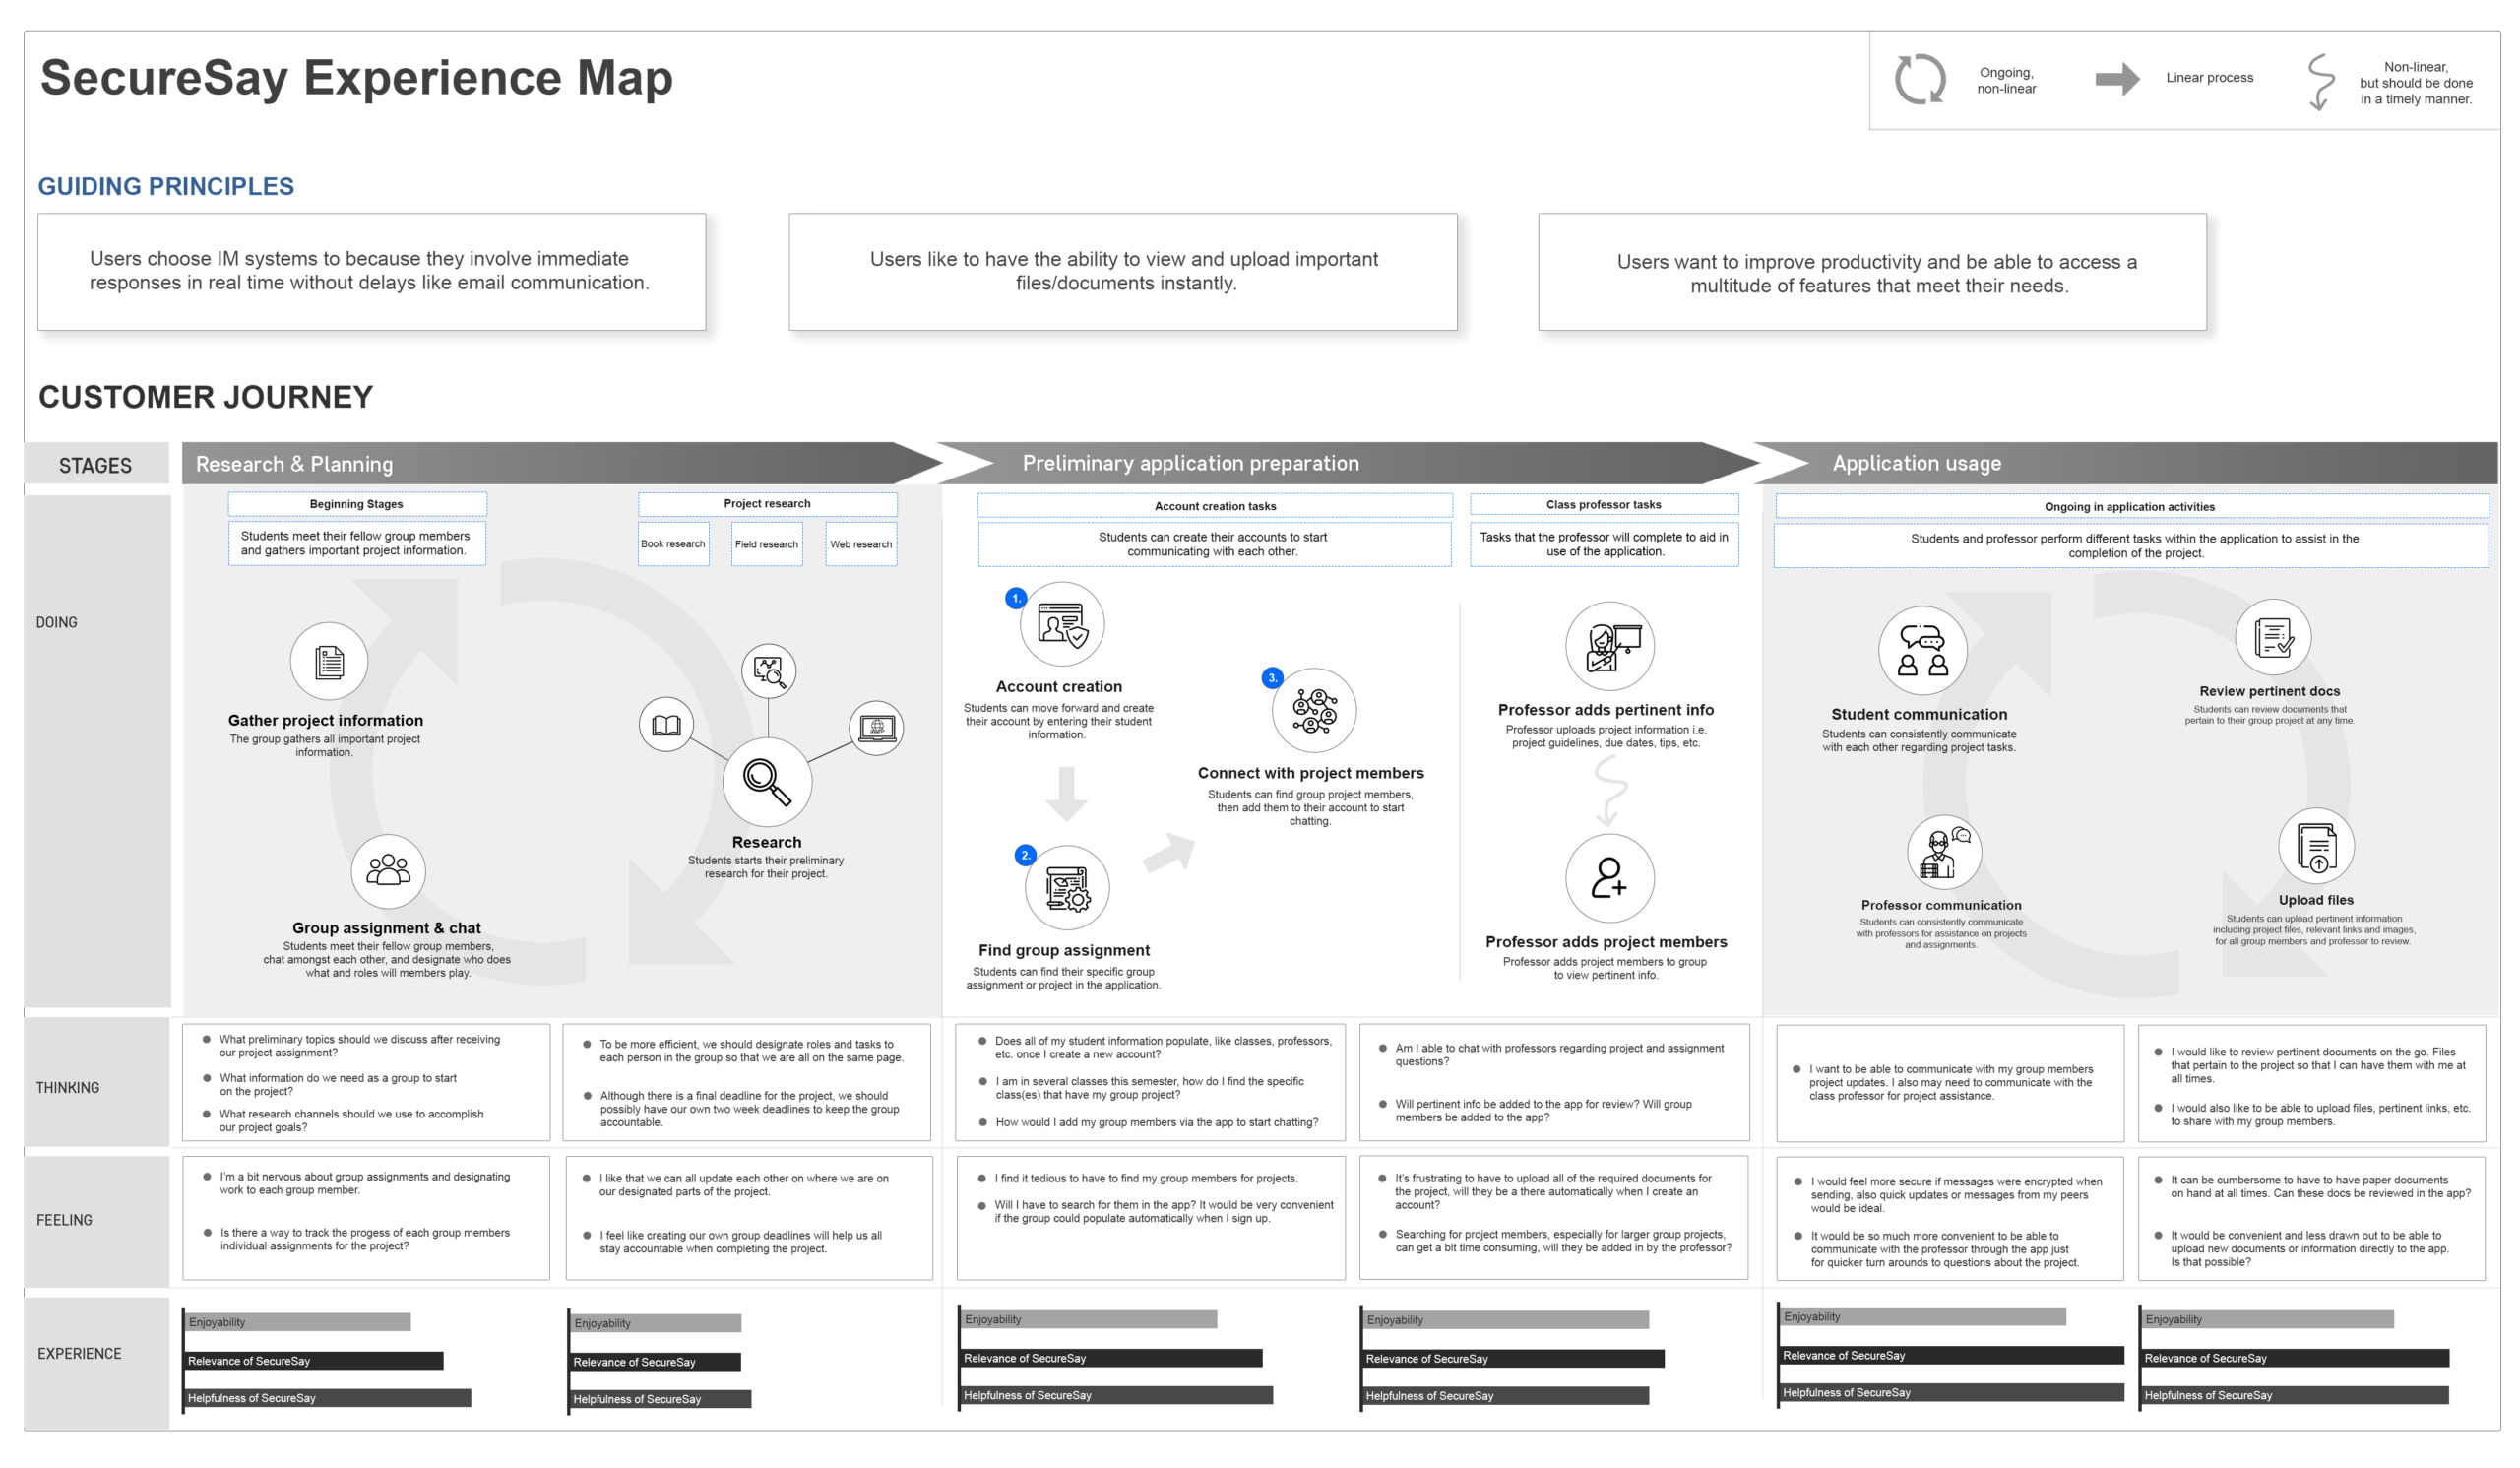
To further validate the application, an experience map was created to help visualize the possible end to end process that a user can take.
Since the concept and main functions were already established, I wanted to start on the content structure and user journey to show exactly how users can accomplish each of the main goals of the application.
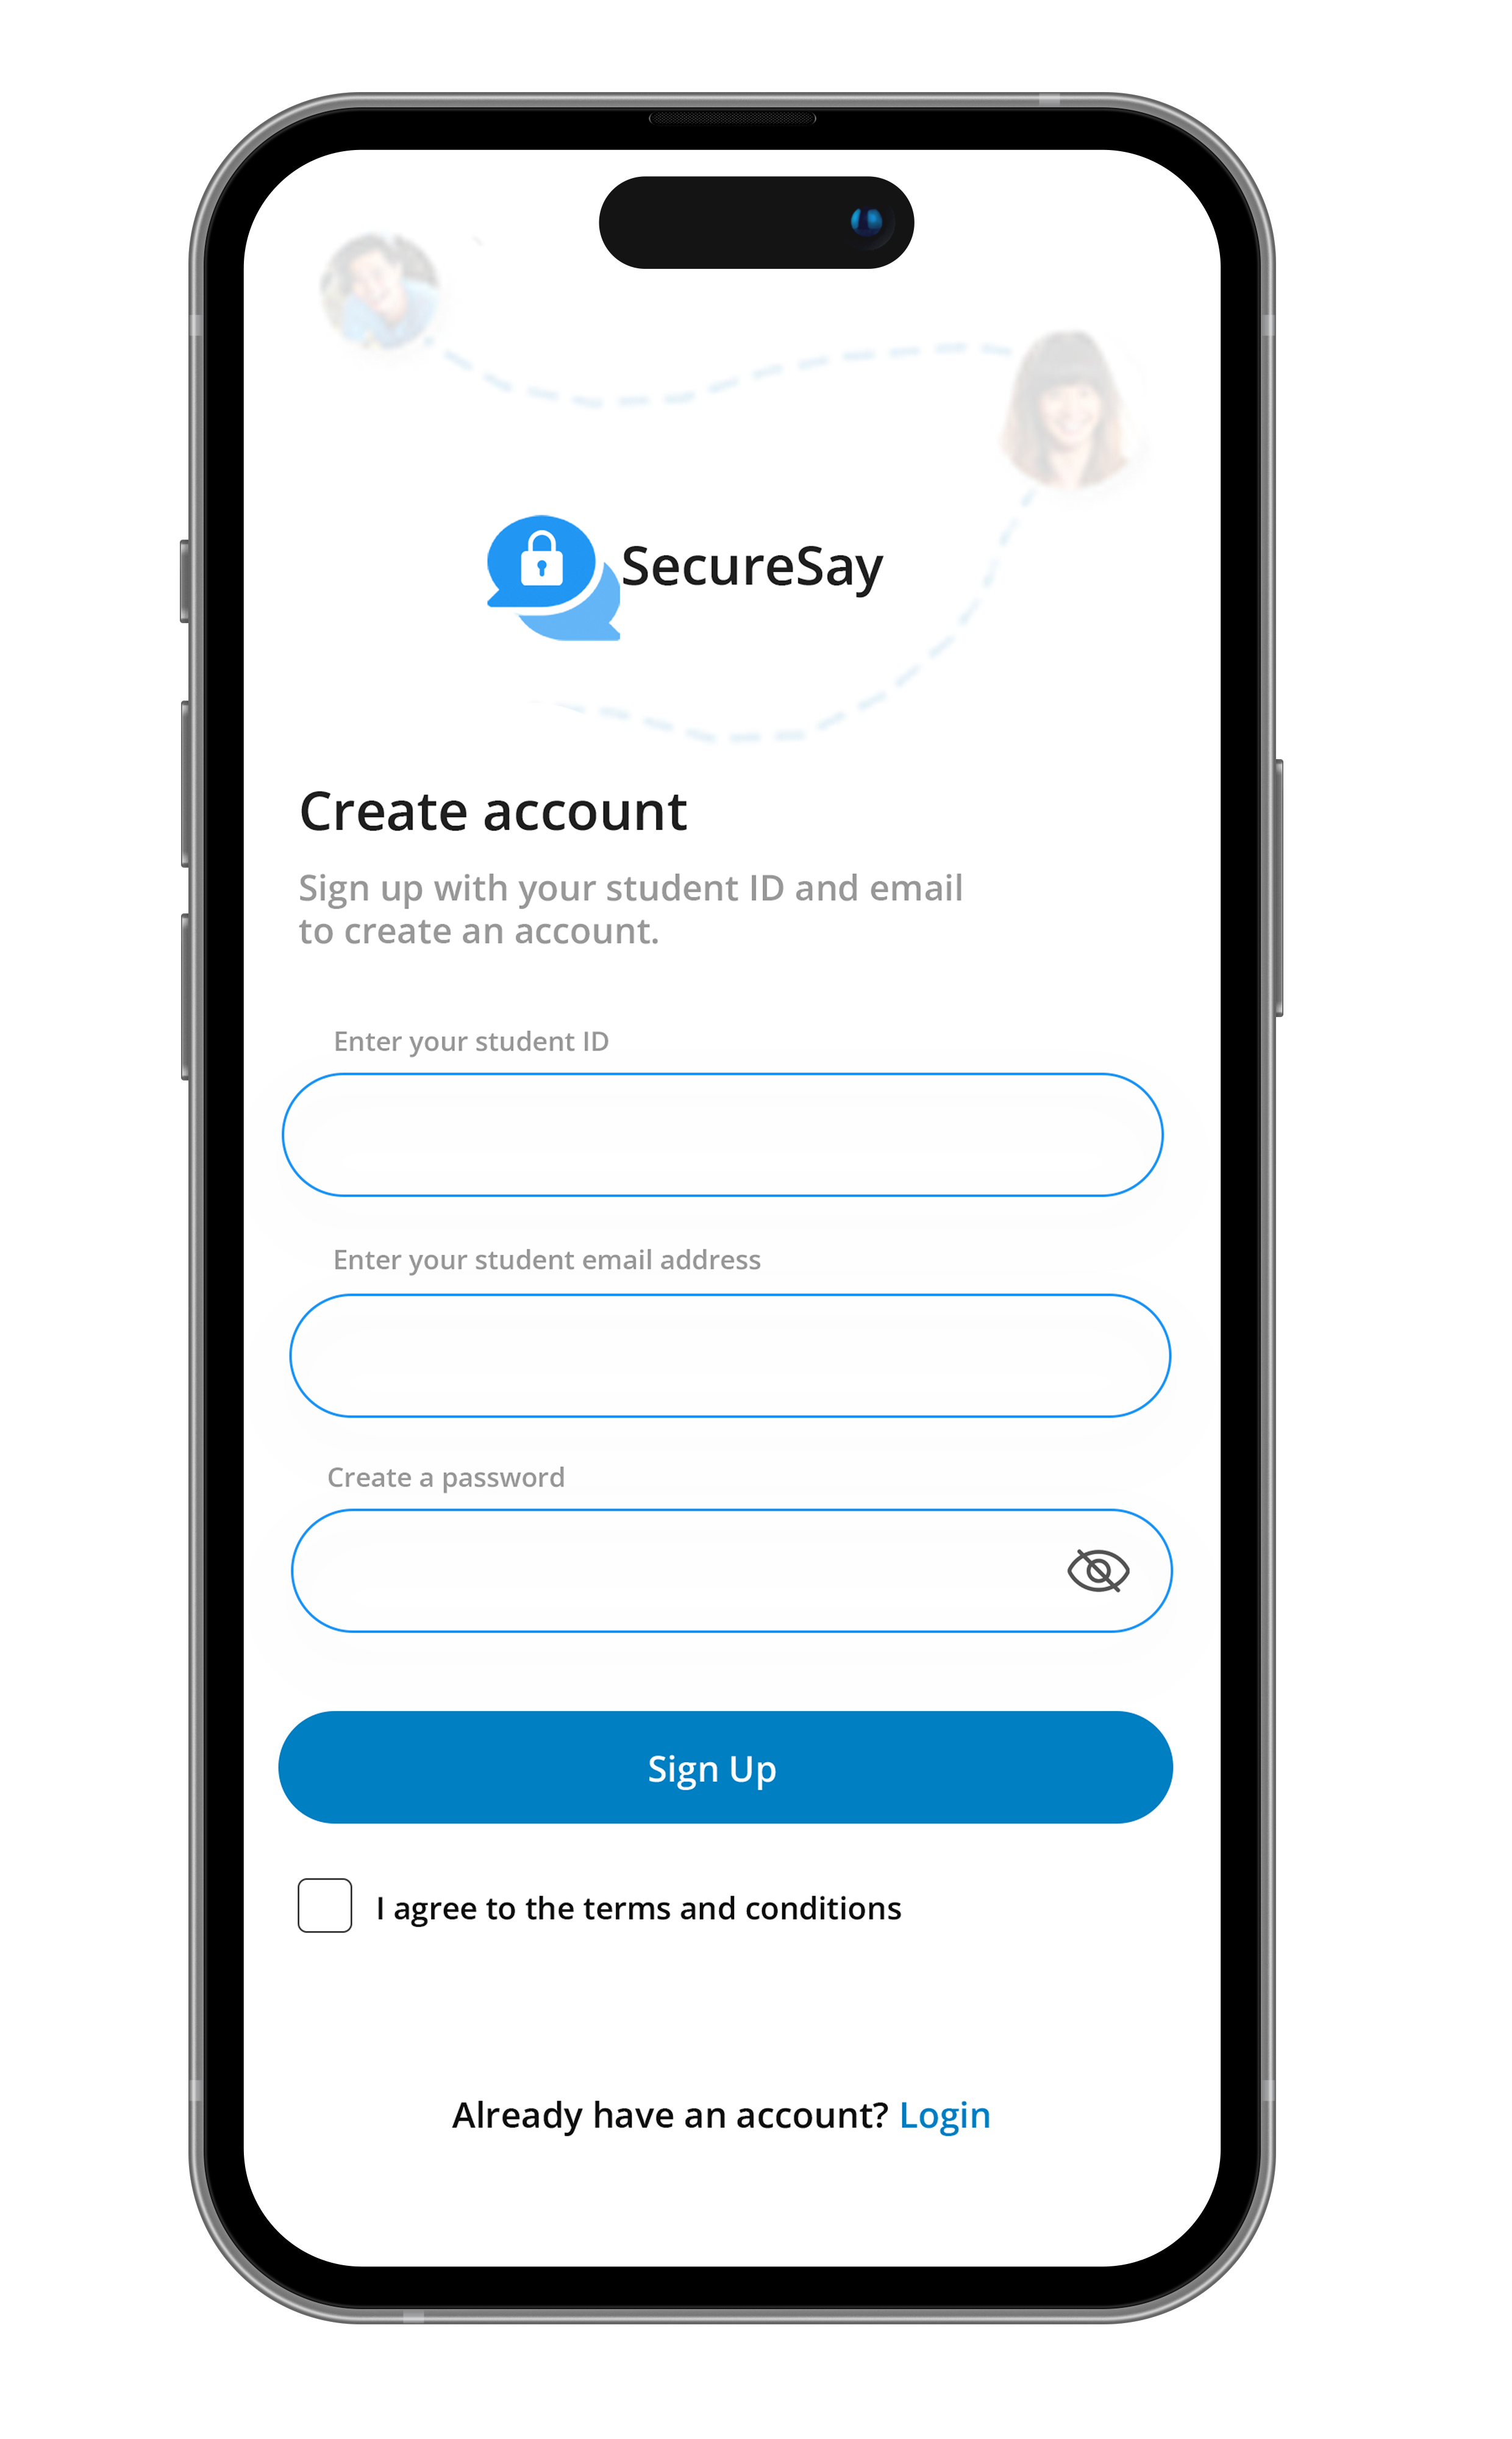
As discussed with the group, we wanted to ensure that there was an onboarding section where students can enter their school credentials to create an account. Also, one of the main features to include was the ability to create folders and upload important documents that pertain to group projects.
For the actual design, the team wanted to keep the user interface as simple as possible where the main focus cover all three of the user insights discovered during user research.
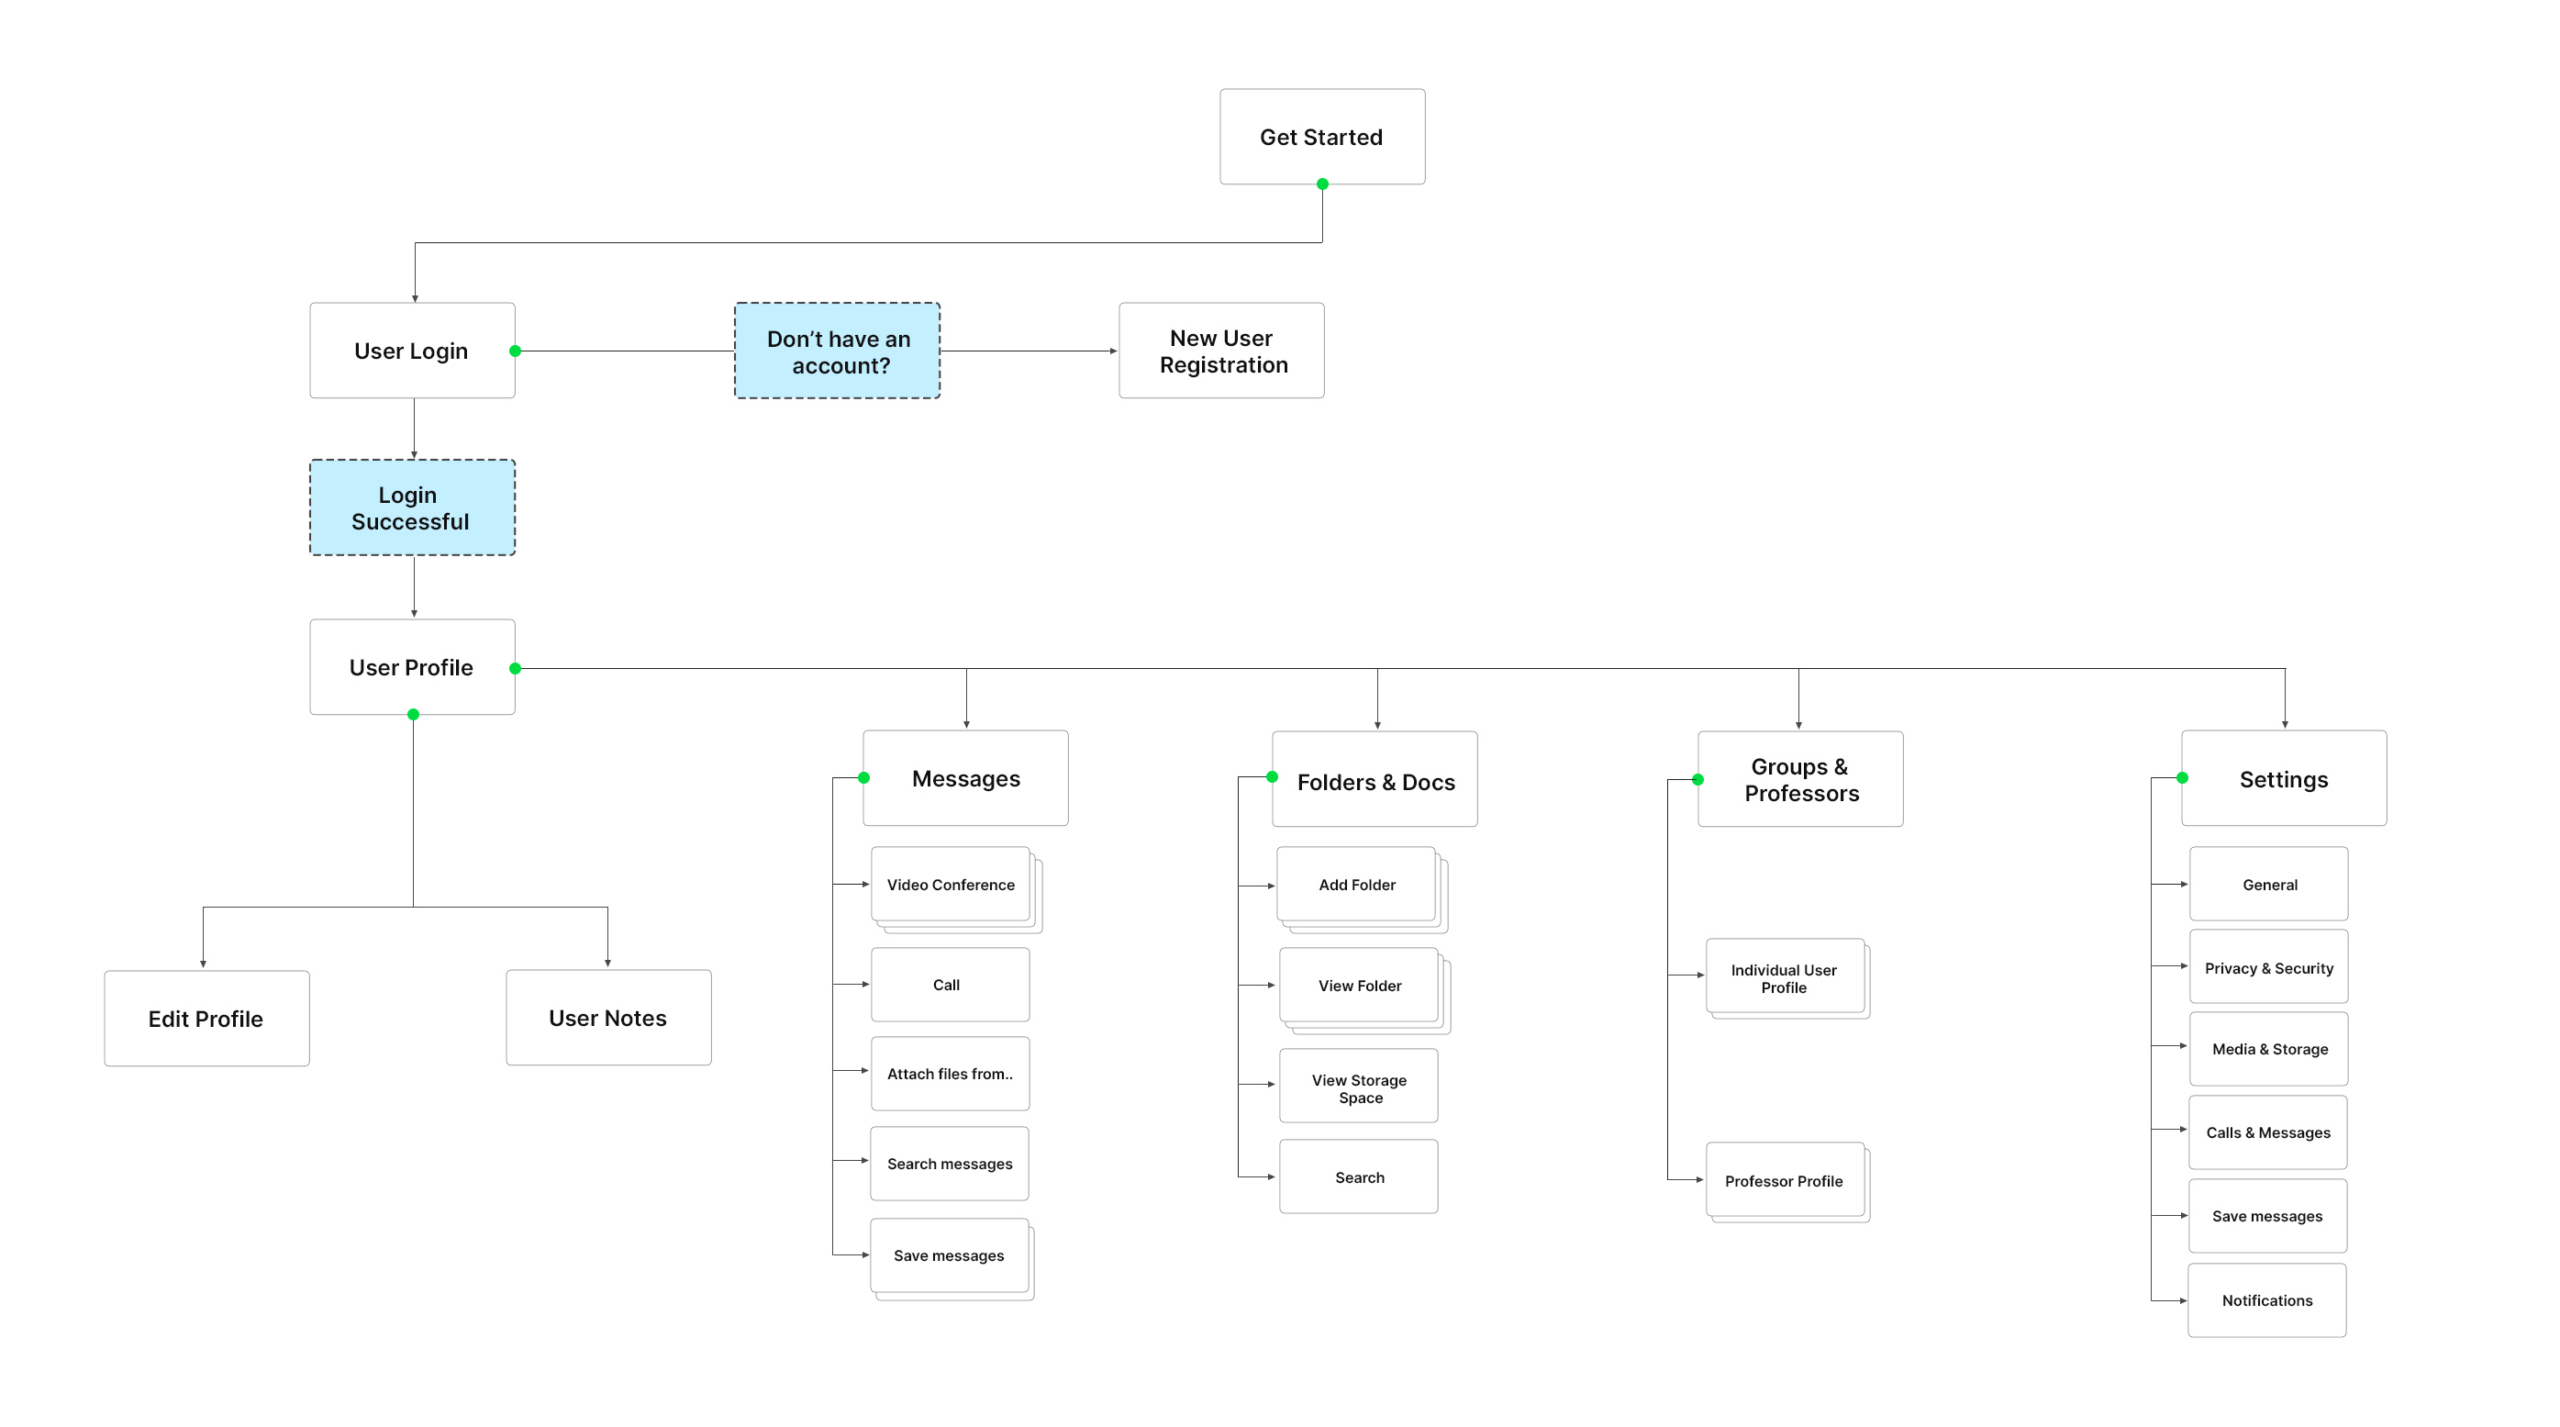
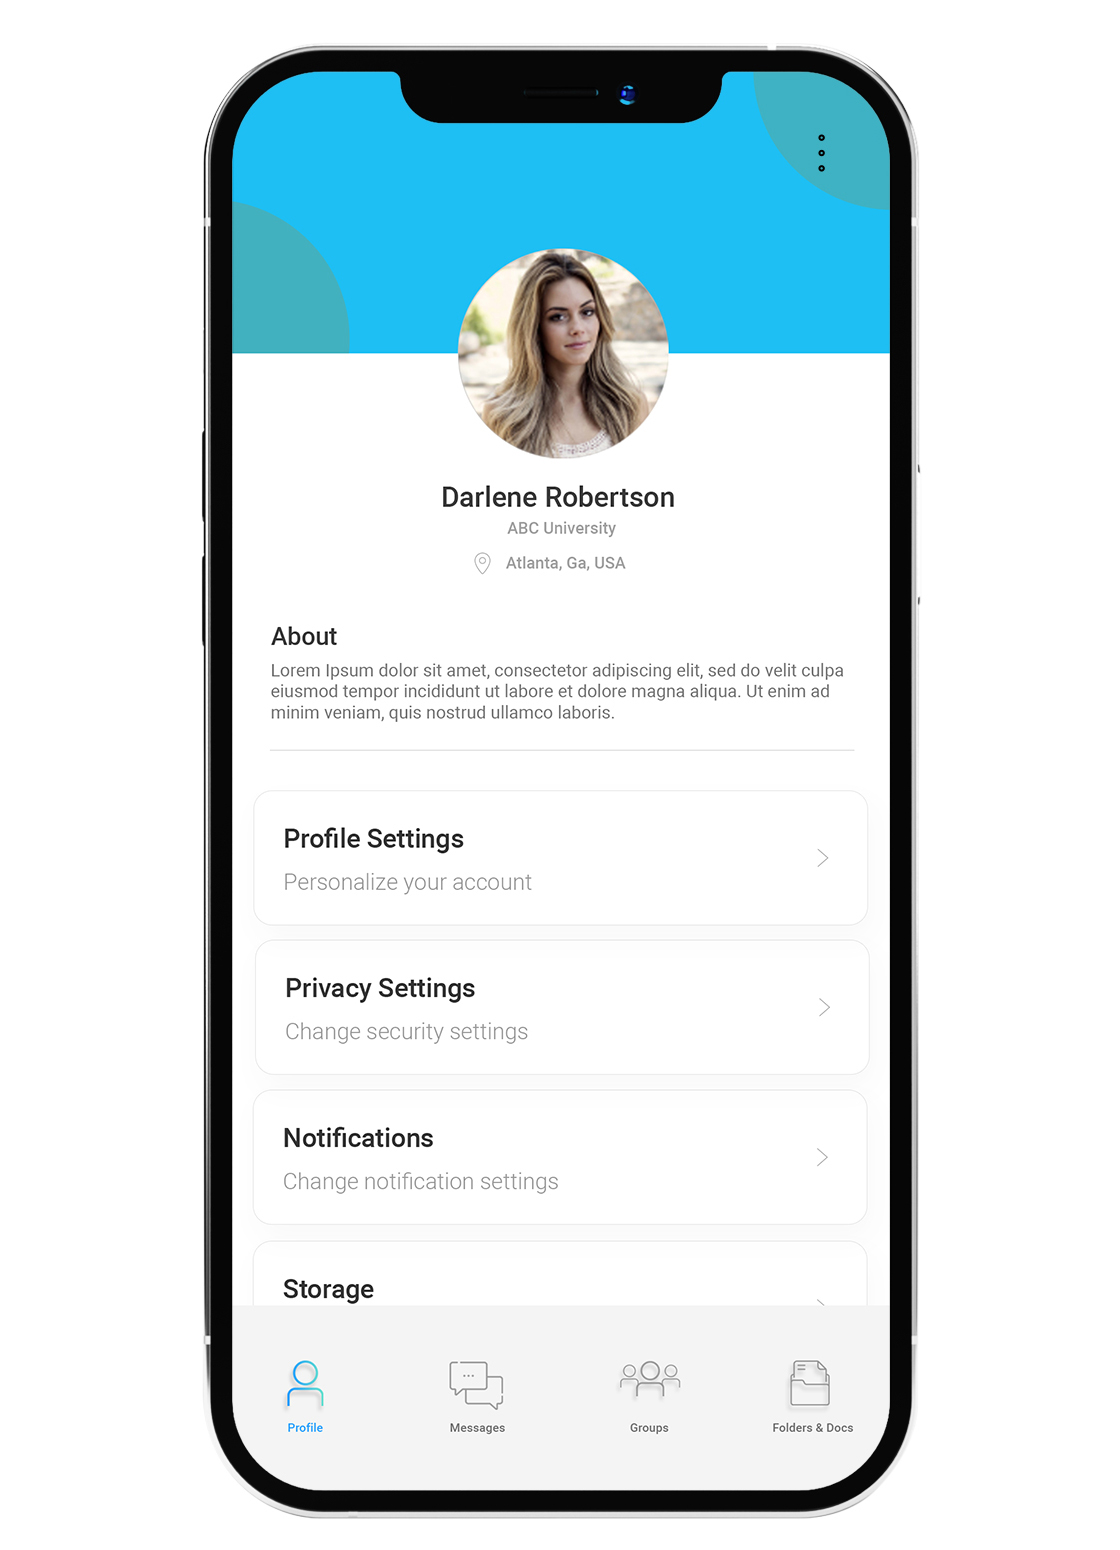
We wanted to focus on four sections of the app including the student profile that would contain all pertinent student information, messages where students can view all of their most recent chats, groups, an area that displays the different chat rooms pertaining to each project, and folders and docs where students can view all created folders and uploaded documents.
Below is a condensed version of wireframes created to showcase the log in, create account page, and user profile that leads to the messaging, folders and documents, and groups page of the application.
The final design focused on the main concepts of the application and further insights for the research team. More users wanted a way to edit documents live and be as detailed as possible.
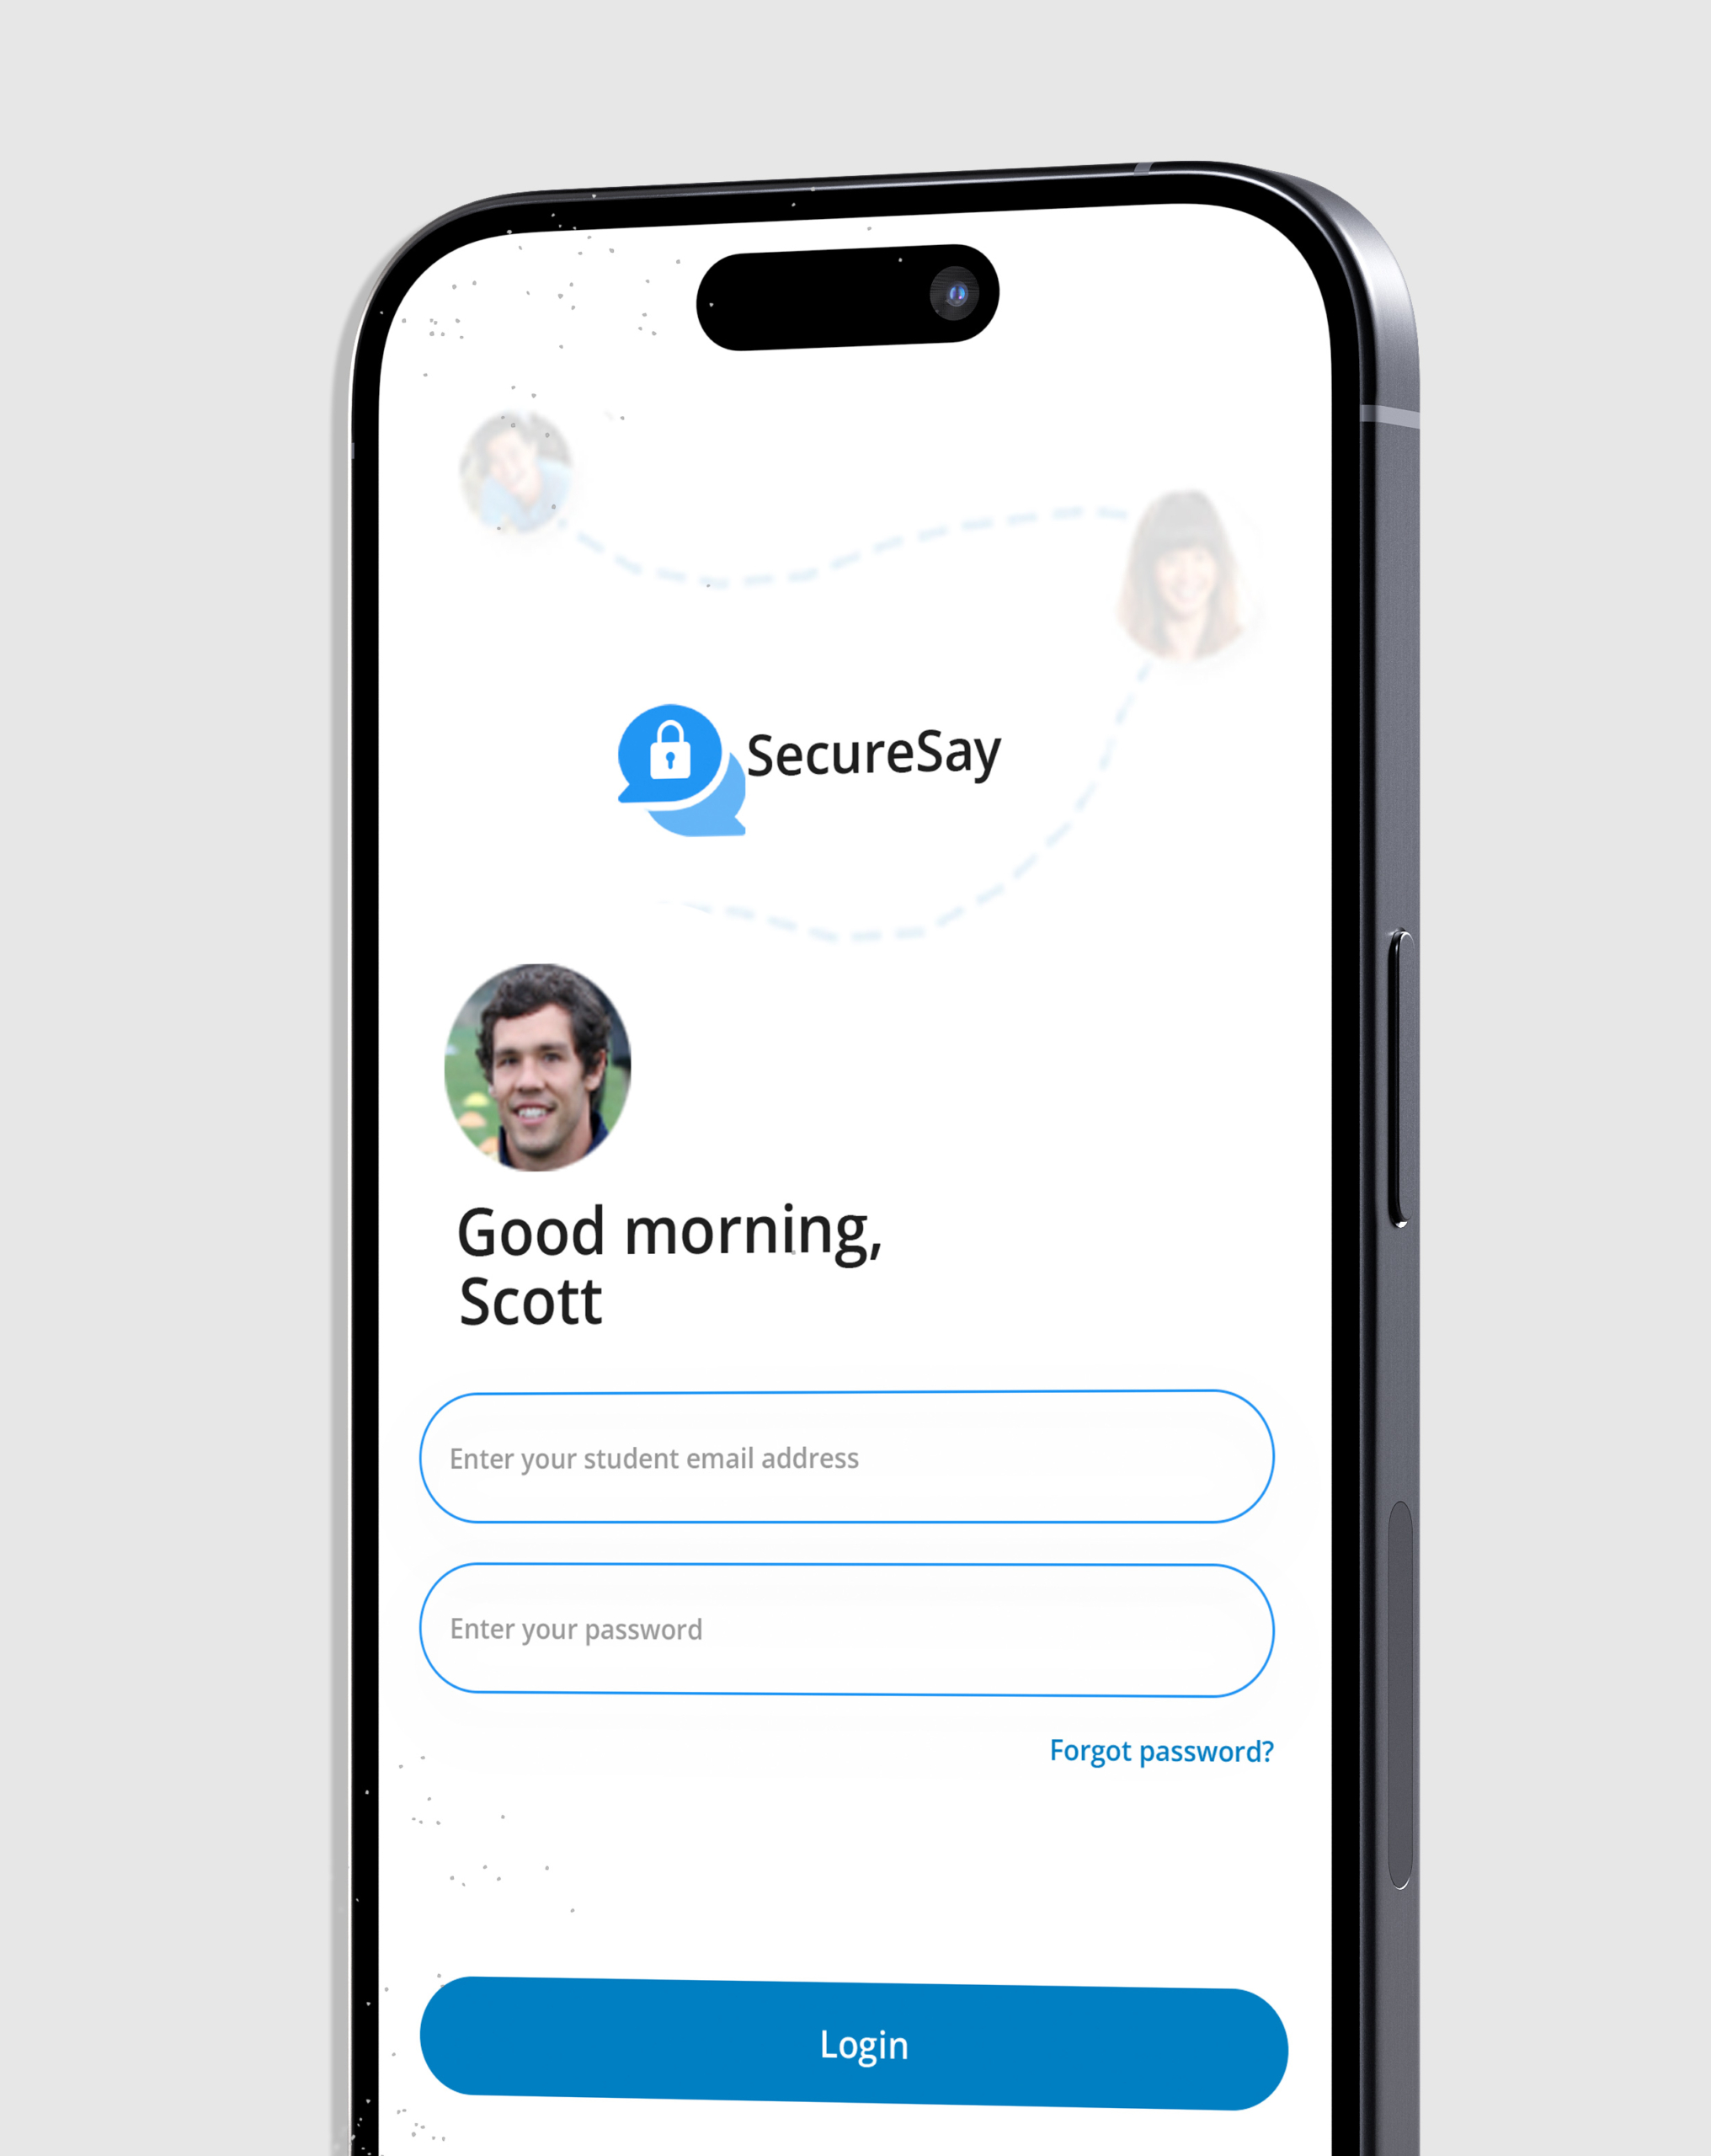
One of our main goals was to place the majority of the focus on a simple and understandable design since there would be quite a few features included in the application. The user interface was kept to a blue gradient design with minimal icons that could be easily understood and self-explanatory. In future designs, an onboarding section was in the works to further break down how each section of the app would work.
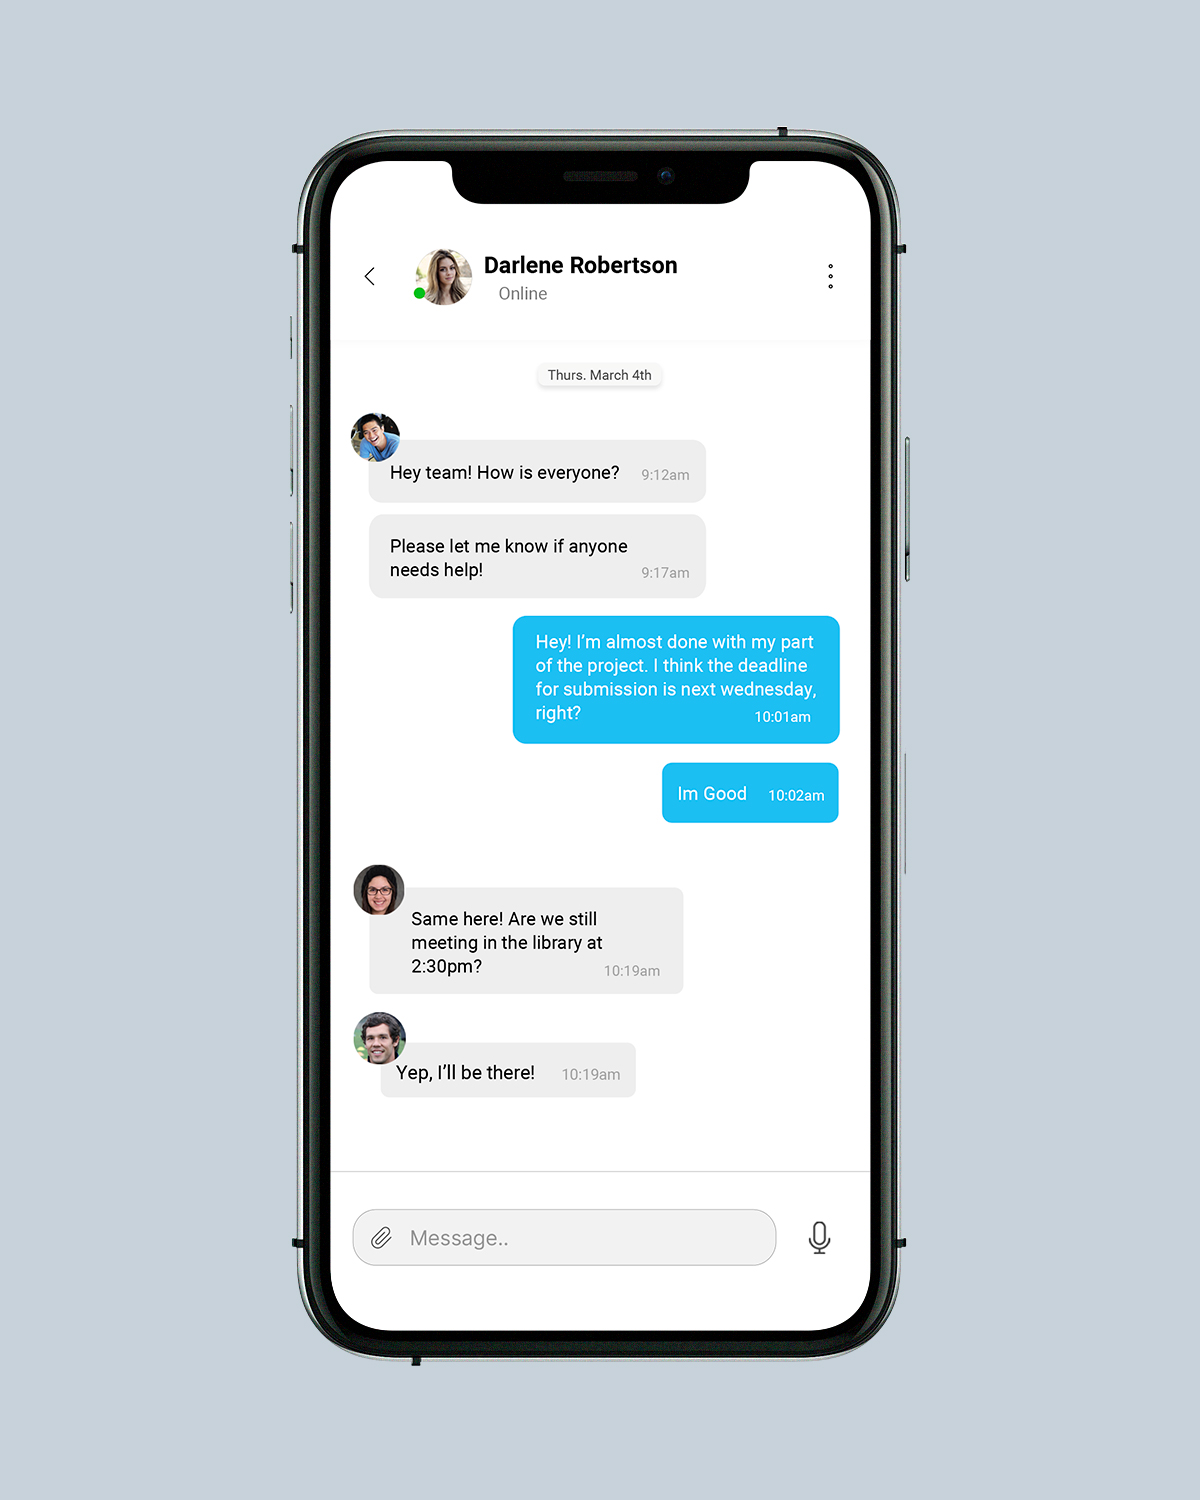
The two screens below show the login page for existing users and a chat screen that shows communication for a group project.
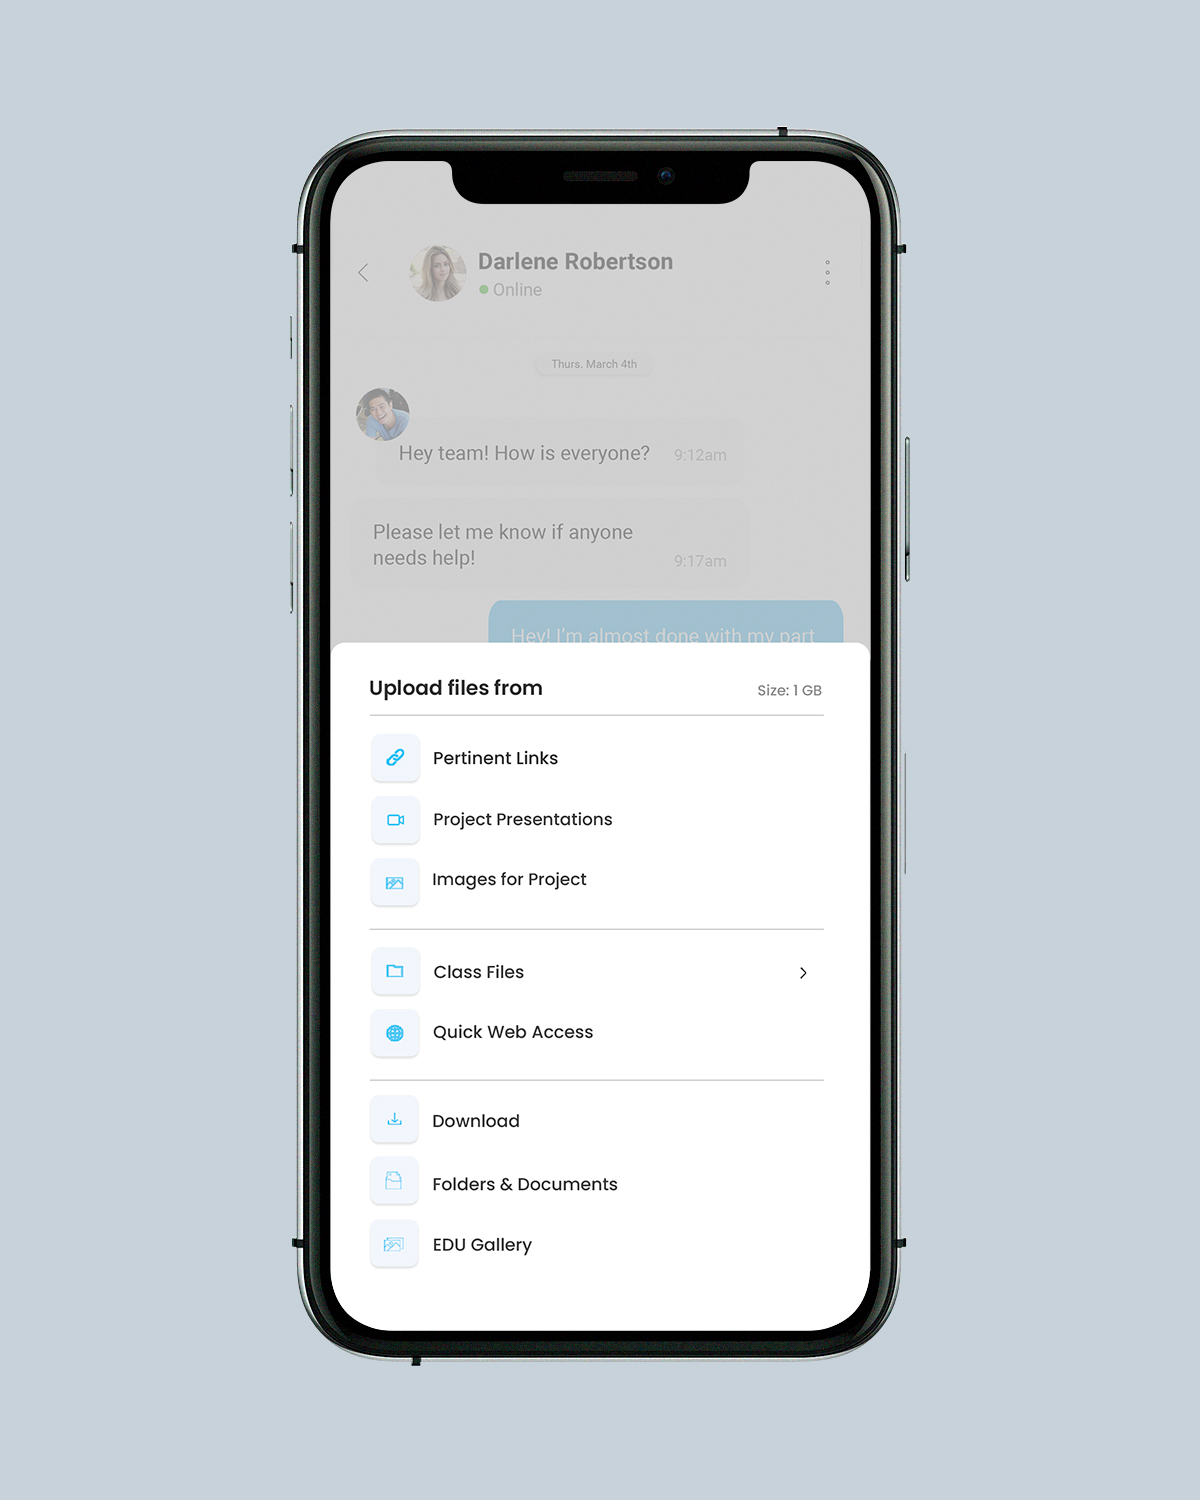
Students can attach files from different folders that they have created or sample images directly from the web.
File Selection List:
— Project presentations for video clips, power point presentations, etc.
— Pertinent images for a project that has been saved.
— Images that relate to a project directly from the internet.
— EDU gallery which allows users to upload directly from the online class portal, etc.
Students can attach files from different folders that they have created or sample images directly from the web.
Student Chat Room
The chat room will include all students to participate who are in a particular project assignment. Students will communicate with each other here.
Upload Option
The upload option allows students to include files including images and other documents that pertain to the project. Students can access this screen by pressing the small paperclip icon in the chat room.
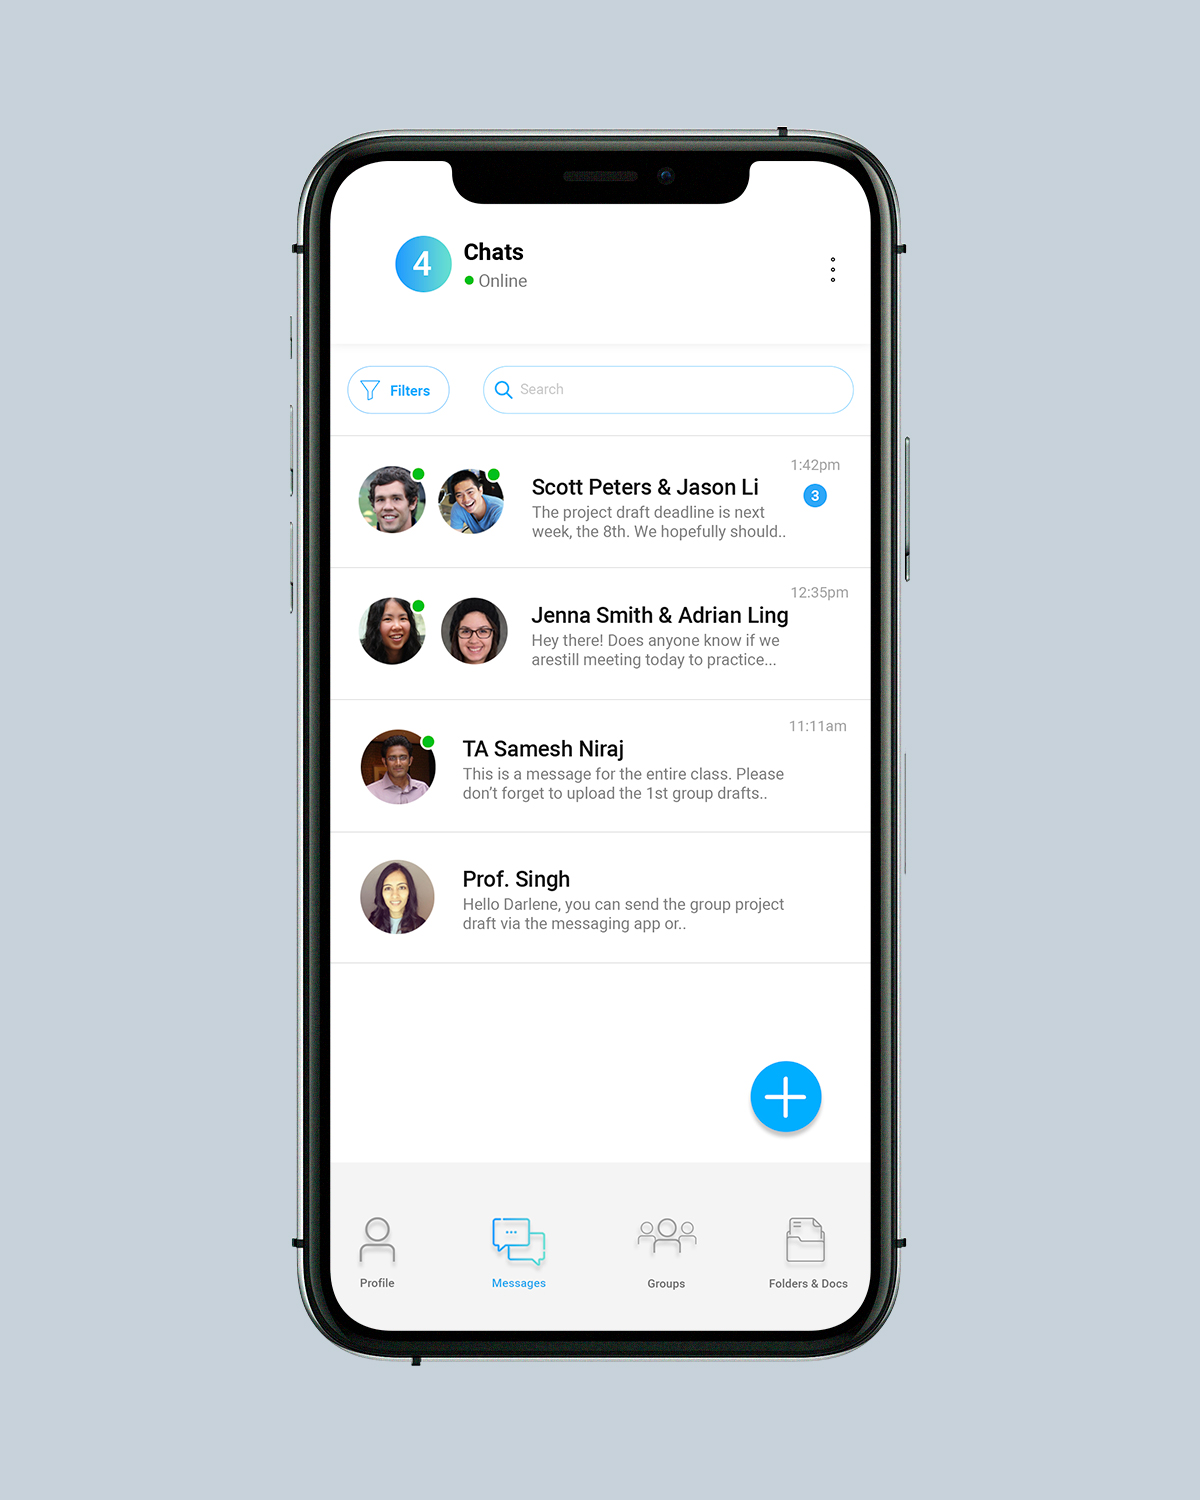
The filtering option below allows students to filter chat screens for different classes to keep up with different group projects. They can also view all group chats and individual people by utilizing this feature.
Student Chat Rooms
This screen displays the multiple chat rooms that a student is involved in. These rooms will be divided by specific projects and will have students pertaining to each project in them.
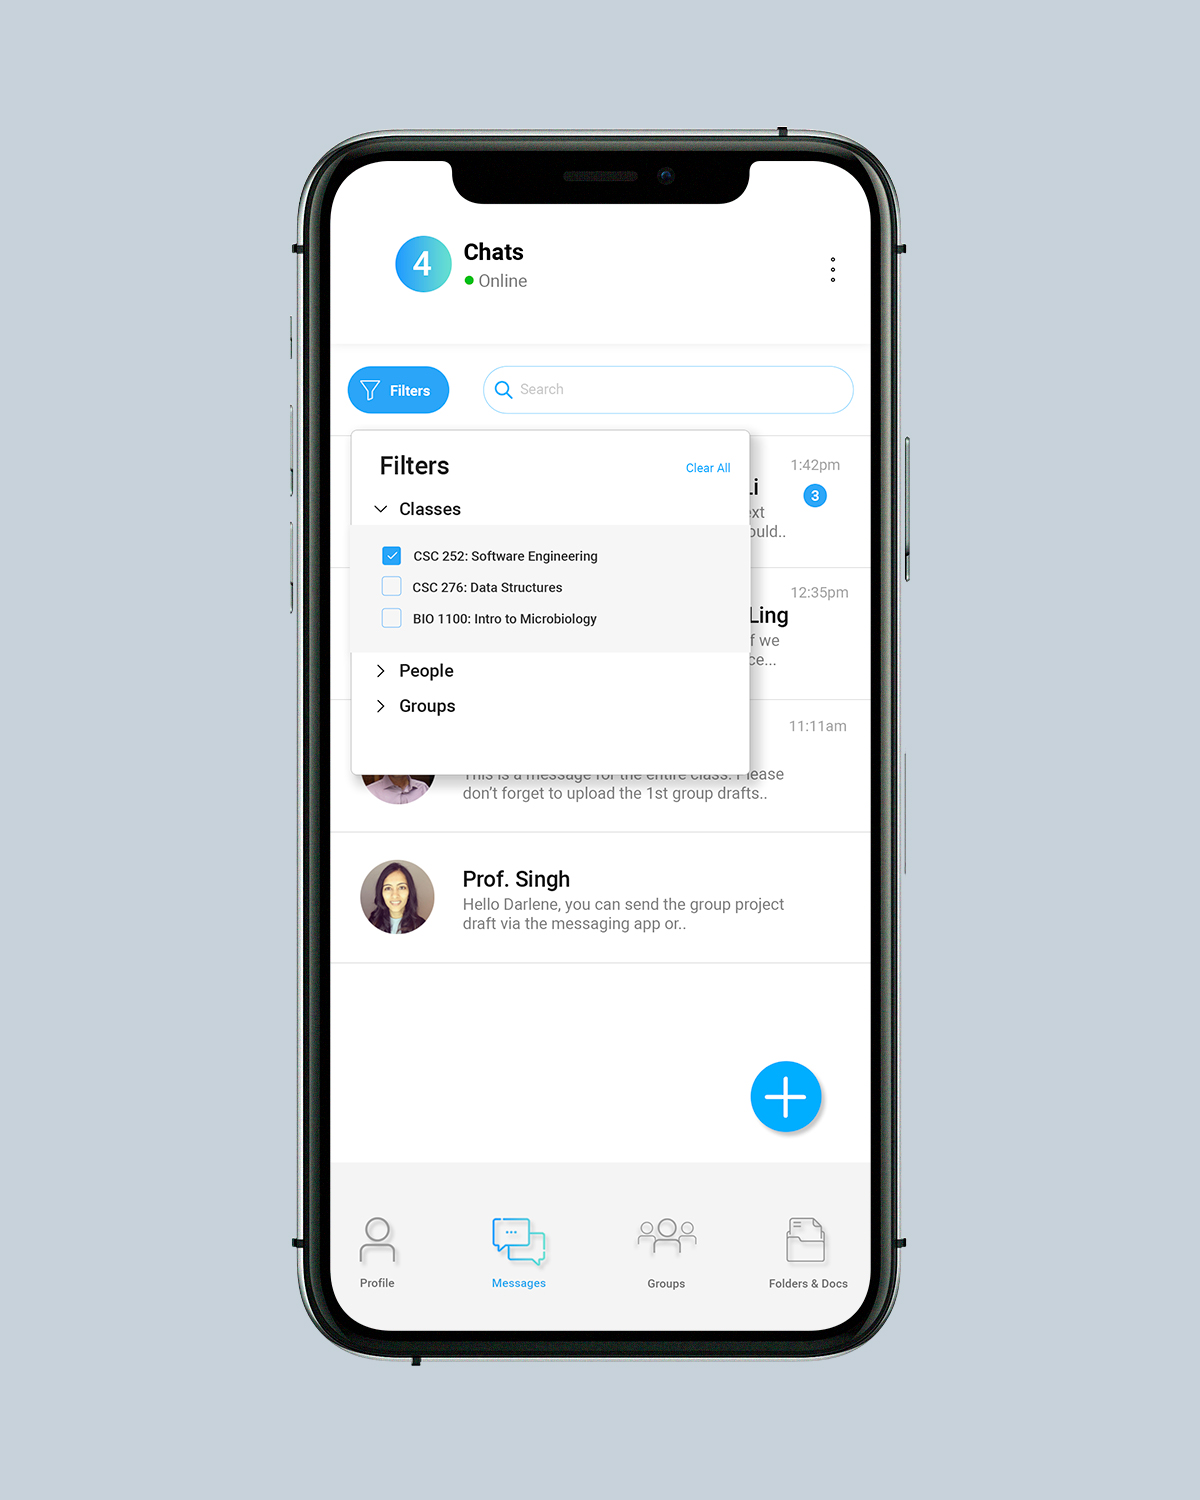
Filter Option
The filter option allows students to filter by class, other students, professors, and groups that the student may be in.
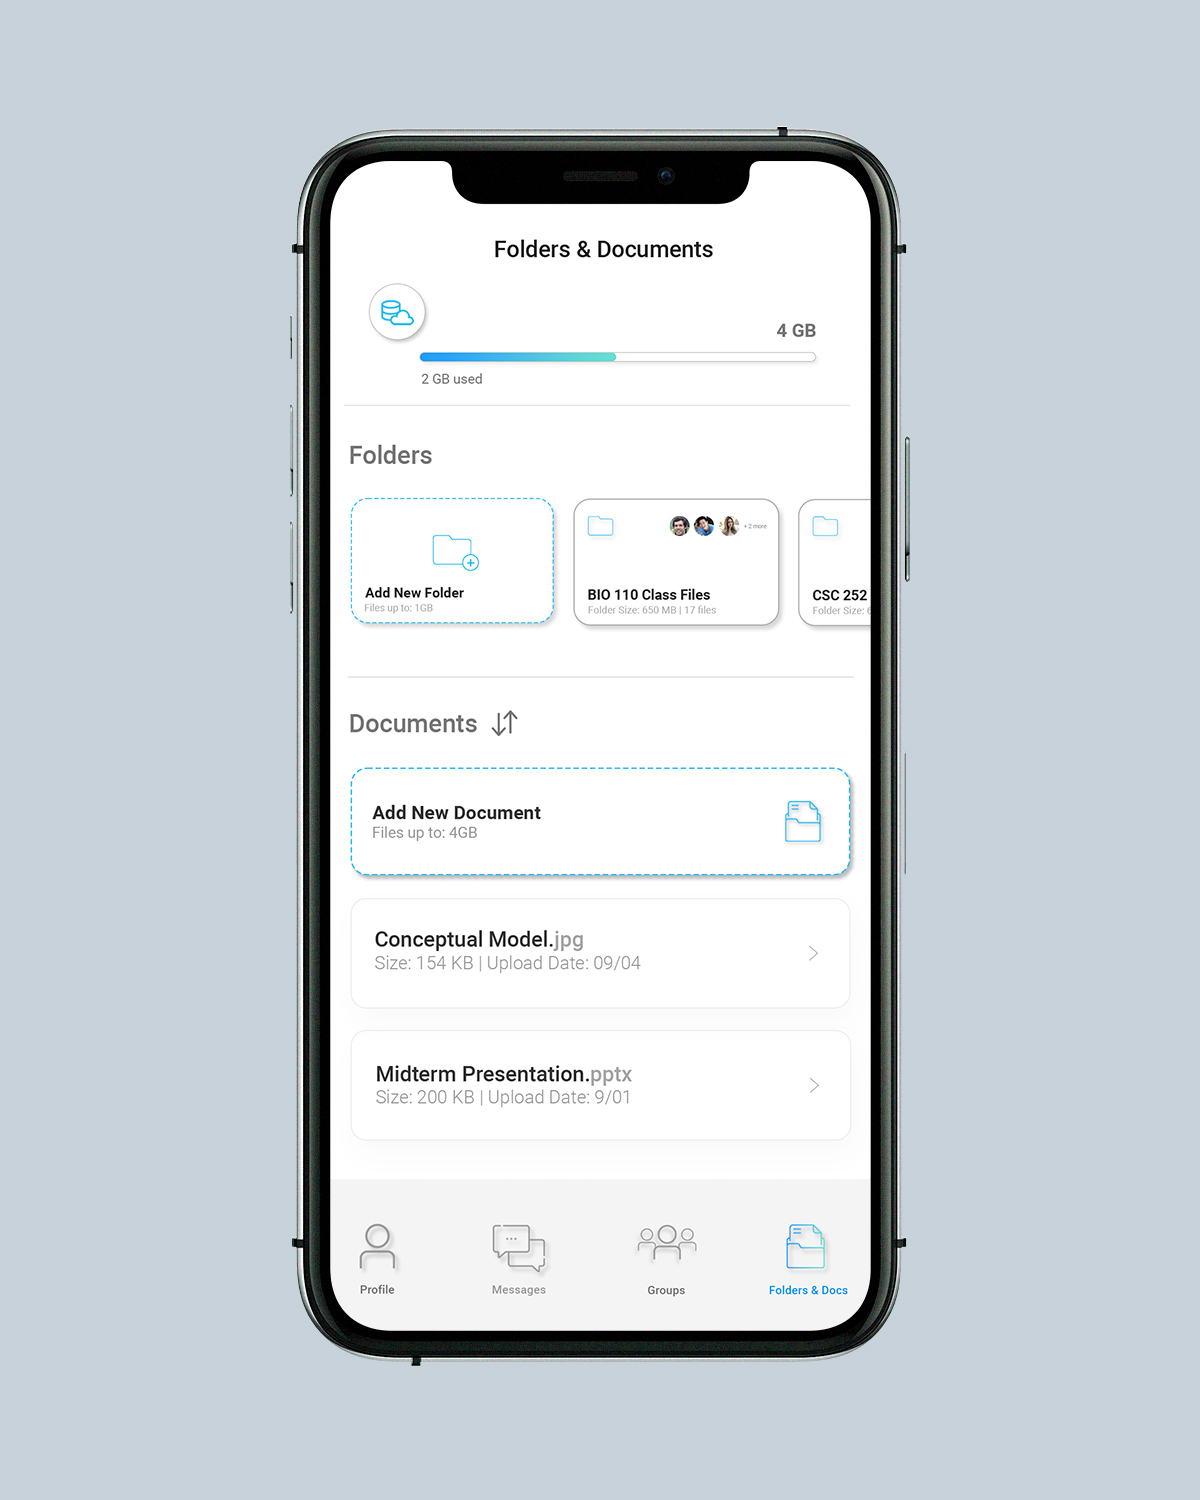
Folders & Documents
The folders and documents screen includes folders that students can create to put pertinent project files in or upload and view documents.
Groups
On the group screen, users can view detailed information regarding project team members and their respective roles, project details and what class it pertains to, due dates, etc. Any important information regarding a project, the user can view here.
Designing for the application was fairly simple, being that most chat applications have the same features. But the added characteristics, such as messaging encryption and saving/uploading documents to the app space made it a bit more complicated. Some insights were:
Communication is key
Knowing that the research team communicates directly with our intended users, I wanted to keep in proximity with them so that we could be on the same page at all times. This would help our design process be more efficient, and we could move onto the next step with confidence.
Notes, notes, and more notes
One thing that was helpful was to always have a notepad on hand when communicating with researchers. This was conducive because I could sketch things that came to mind, brainstorm, and show my ideas to the research team.